Subtotal: 1,500 د.ع
Arduino + 2 Servos + Thumb stick (joystick) Leave a comment
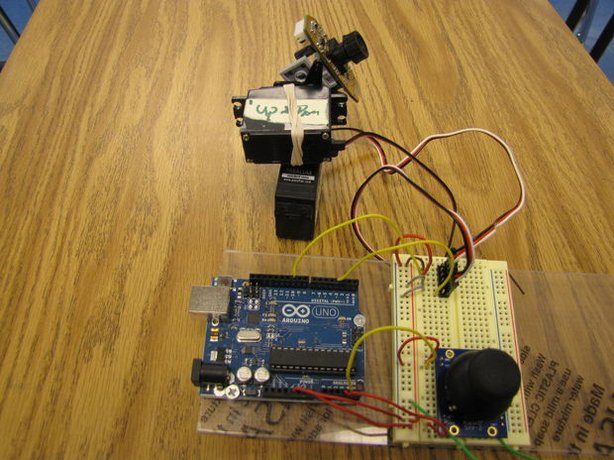
this Experiment is about moving 2 Servos with thumb stick joystick.
Step 1: Materials
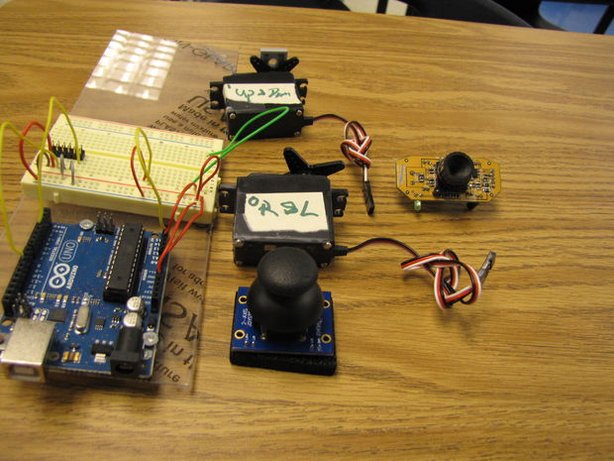
Hardware:
- Arduino Board (Arduino UNO R3).
- 2 servo Motors.
- Dual Axis Thumb stick (joystick).
- Breadboard + Jumper Wire
Step 2: Connecting the servos
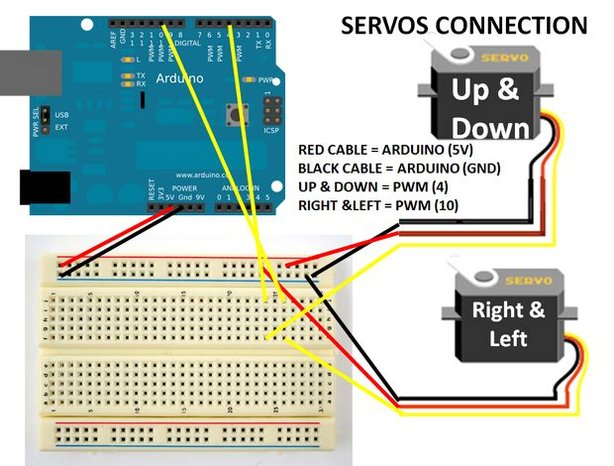
| Servo (Up/Down) | Arduino | Servo (Right/Left) | Arduino |
| RED Cable | 5V | RED Cable | 5V |
| Black Cable | GND | Black Cable | GND |
| Yellow Or White Cable | PWM 4 | Yellow or White Cable | PWM 10 |
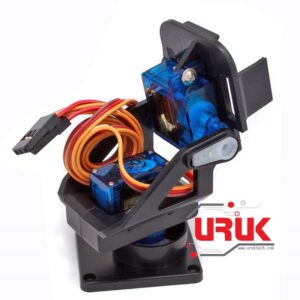
Note: Use Pan-tilt Bracket Platform to mount the servos on.
Step 3: Connecting the thumb stick (joystick)
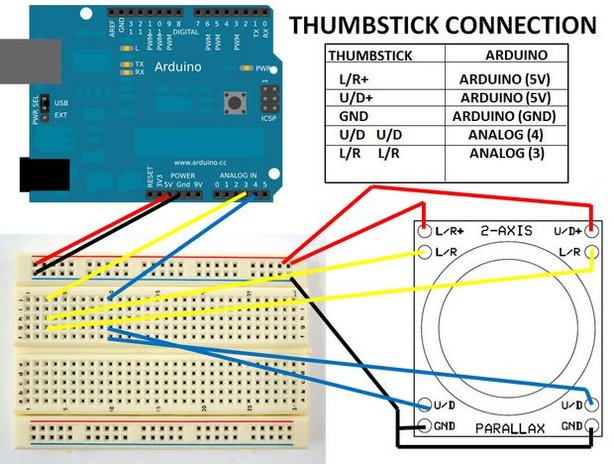
The following connection will confuse you a little, just follow the picture.
Again using a breadboard will make things easier.
1. The thumb stick has one U/R+ and one L/R+ these two connections will provide power to the joystick. Connect them to the Arduino 5V connection.
2. Also, the joystick has two L/R connections and two U/D connections it is important that you connect both of them to the respective Arduino pin.
3. Do the same to both GND connections on the joystick.
| Thumb stick | Arduino |
| L/R+ | 5V |
| U/D+ | 5V |
| GND, GND | GND |
| U/D, U/D | Analog 4 |
| L/R L/R |
Analog 3 |
Step 4: The Code
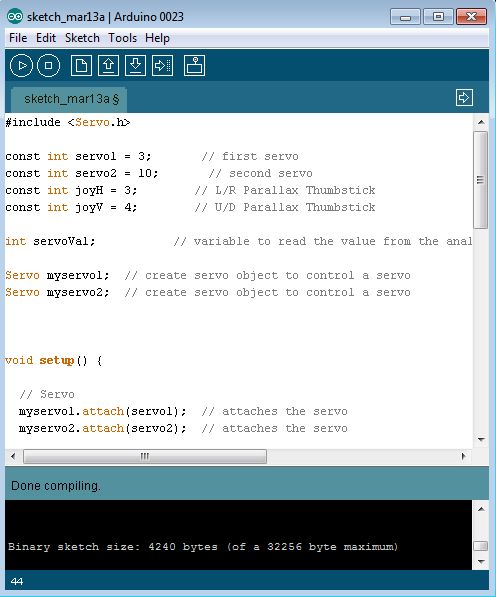
Always test (compile) the code before uploading it to the Arduino Board.
When you upload the code to the arduino the servos should not move until you use the joystick.
Arduino Code
#include <Servo.h>
const int servo1 = 3; // first servo
const int servo2 = 10; // second servo
const int joyH = 3; // L/R Parallax Thumbstick
const int joyV = 4; // U/D Parallax Thumbstick
int servoVal; // variable to read the value from the analog pin
Servo myservo1; // create servo object to control a servo
Servo myservo2; // create servo object to control a servo
void setup() {
// Servo
myservo1.attach(servo1); // attaches the servo
myservo2.attach(servo2); // attaches the servo
// Inizialize Serial
Serial.begin(9600);
}
void loop(){
// Display Joystick values using the serial monitor
outputJoystick();
// Read the horizontal joystick value (value between 0 and 1023)
servoVal = analogRead(joyH);
servoVal = map(servoVal, 0, 1023, 0, 180); // scale it to use it with the servo (result between 0 and 180)
myservo2.write(servoVal); // sets the servo position according to the scaled value
// Read the horizontal joystick value (value between 0 and 1023)
servoVal = analogRead(joyV);
servoVal = map(servoVal, 0, 1023, 70, 180); // scale it to use it with the servo (result between 70 and 180)
myservo1.write(servoVal); // sets the servo position according to the scaled value
delay(15); // waits for the servo to get there
}
/**
* Display joystick values
*/
void outputJoystick(){
Serial.print(analogRead(joyH));
Serial.print (“—“);
Serial.print(analogRead(joyV));
Serial.println (“—————-“);
}
The items used in this experiment
المواد المستخدمة في التجربة يمكنكم اضافتها الى سلة مشترياتكم مباشرة من هنا
-
Input Peripherals
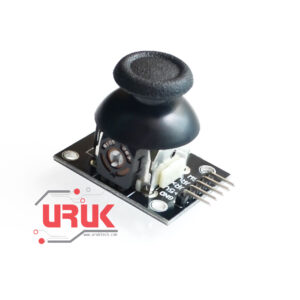
Dual Axis Joystick Module
مودل Joystick يستخدم لسيطرة على اي حركة عن طريق التحكم بشكل مباشر بعصا التحكم حيث يحتوي المودل على مخارج للحركة العمودية والافقية بالاضافة الى مفتاح الضغط لاضافة مزايا اخرى لاي مشروع. سهل الاستخدام والربط والبرمجة مع اي متحكم مثل الاردوينو ومن اشهر التطبيقات التي يستخدم فيها هو التحكم بالروبوتات.
SKU: 4 -
-
Robotics & Control, Servo Motors
TowerPro SG90 Servo Motor
سيرفو ماطور الغني عن التعريف (SG90) يمتاز بصغر حجمه ودورانه لغاية زاوية 180 درجة وبعزم قدره (1.80 kg-cm)، سهل البرمجة حيث يمكن برمجته من خلال ايعاز واحد فقط بأستخدام الاردوينو ويمكن استخدامه في الكثير من المشاريع والتجارب بالاخص مشاريع الروبوت.
SKU: 16






 1m of 5Pins Extension Flexible Wire 22 AWG