Smoke Detection Using MQ-2 Gas Sensor Leave a comment
Components and Supplies:
- Arduino UNO.
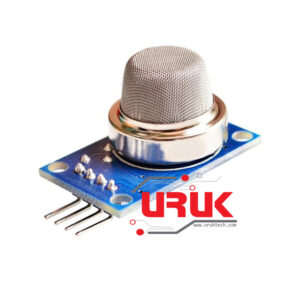
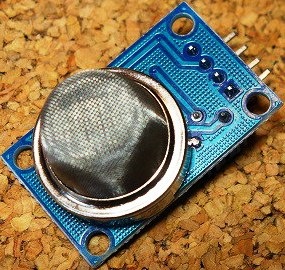
- MQ-2 Smoke Detection Sensor.
- Male/Female Jumper Wires.
- Resistors>
About This Experiment:
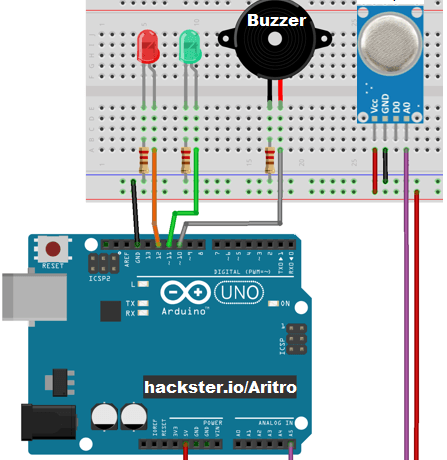
In this experiment, you will read the sensor analogue output voltage and when the smoke reaches a certain level, it will make sound a buzzer and a red LED will turn on. When the output voltage is below that level, a green LED will be on.
What is an MQ-2 Smoke Sensor?
The MQ-2 smoke sensor is sensitive to smoke and to the following flammable gases:
- LPG
- Butane
- Propane
- Methane
- Alcohol
- Hydrogen
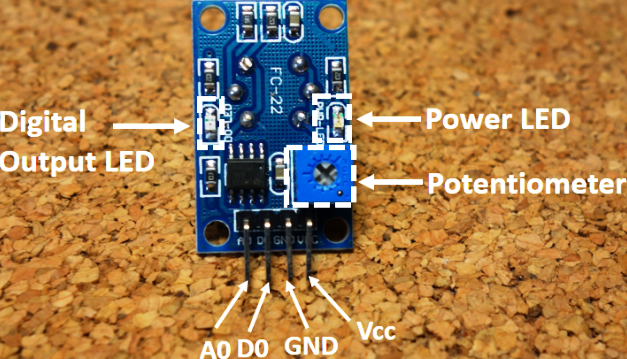
The resistance of the sensor is different depending on the type of the gas. The smoke sensor has a built-in potentiometer that allows you to adjust the sensor sensitivity according to how accurate you want to detect gas.
How does it Work?
The voltage that the sensor outputs changes accordingly to the smoke/gas level that exists in the atmosphere. The sensor outputs a voltage that is proportional to the concentration of smoke/gas.
In other words, the relationship between voltage and gas concentration is the following:
- The greater the gas concentration, the greater the output voltage
- The lower the gas concentration, the lower the output voltage
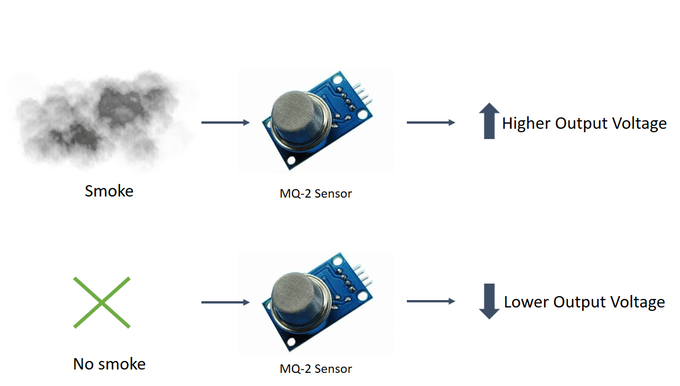
The output can be an analogue signal (A0) that can be read with an analogue input of the Arduino or a digital output (D0) that can be read with a digital input of the Arduino.
Pin Wiring
The MQ-2 sensor has 4 pins.
|
Pin |
Wiring to Arduino UNO |
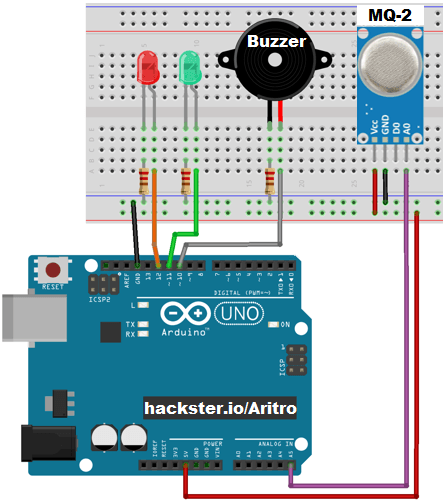
| A0 | Analogue Pins |
| D0 | Digital Pins |
| GND | GND |
| VCC | 5V |
So, before jumping into the coding part, let’s check whether we’ve assembled all the necessary hardware components.
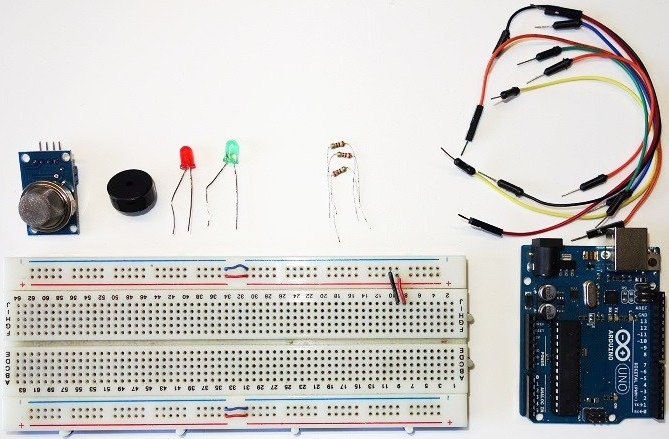
Kindly refer to the connection schematic attached below. After you’ve wired all the components properly, it’s time to upload the necessary code.
Arduino Code
int redLed = 12;
int greenLed = 11;
int buzzer = 10;
int smokeA0 = A5;
// Your threshold value
int sensorThres = 400;
void setup() {
pinMode(redLed, OUTPUT);
pinMode(greenLed, OUTPUT);
pinMode(buzzer, OUTPUT);
pinMode(smokeA0, INPUT);
Serial.begin(9600);
}
void loop() {
int analogSensor = analogRead(smokeA0);
Serial.print(“Pin A0: “);
Serial.println(analogSensor);
// Checks if it has reached the threshold value
if (analogSensor > sensorThres)
{
digitalWrite(redLed, HIGH);
digitalWrite(greenLed, LOW);
tone(buzzer, 1000, 200);
}
else
{
digitalWrite(redLed, LOW);
digitalWrite(greenLed, HIGH);
noTone(buzzer);
}
delay(100);
}


